Warning
Please note that the documentation you are currently viewing is for an older version of our technology. While it is still functional, we recommend upgrading to our latest and more efficient option to take advantage of all the improvements we’ve made.
Integrate AIMMS with Python
This article is part of a series of examples on how to connect AIMMS with models built in Python or R. If you have not already, read Connecting AIMMS with Data Science Models before continuing.
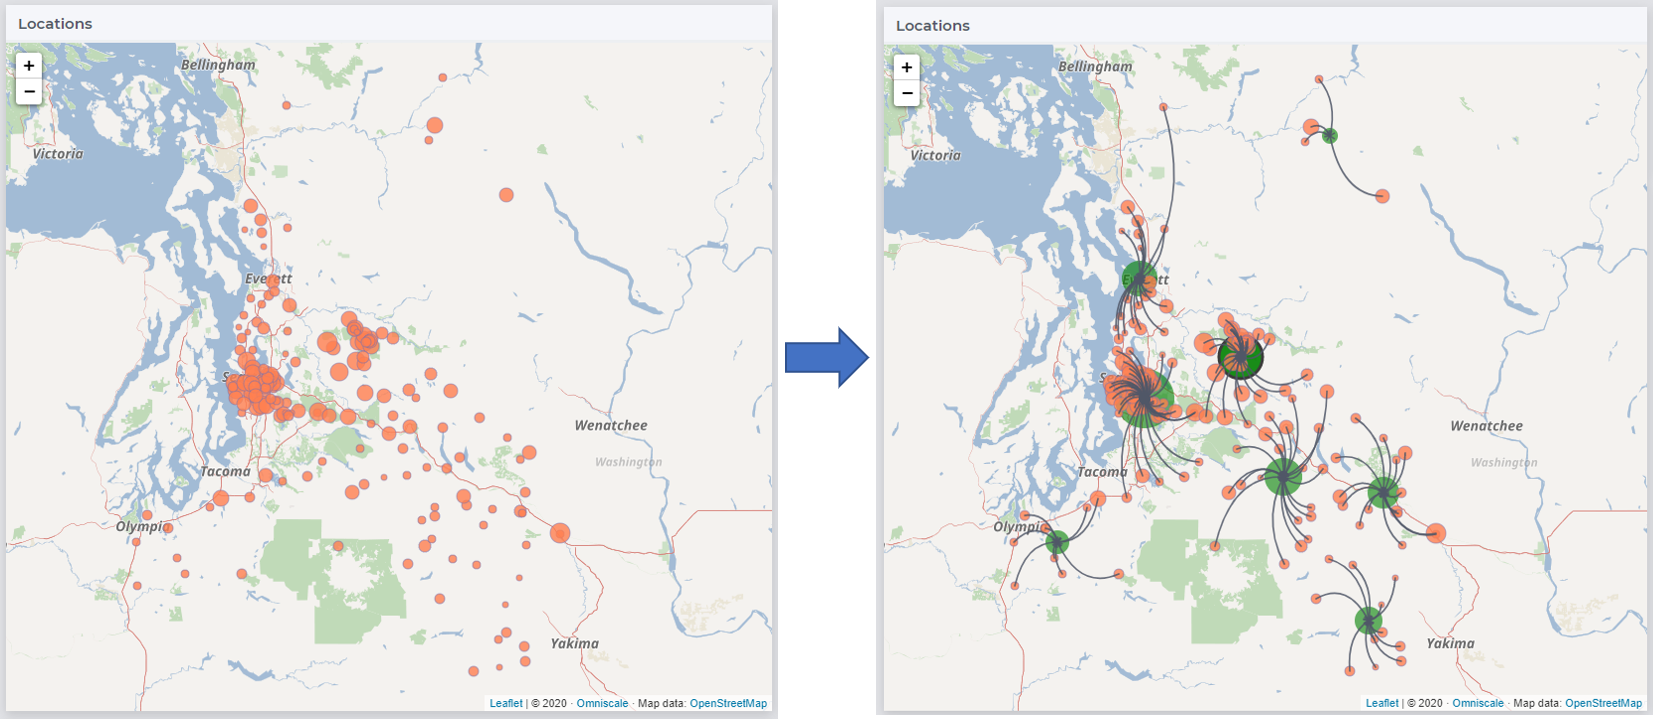
In this article, we will show how to integrate an AIMMS app with a KMeans clustering model built in Python using scikit-learn. The clustering model is used to identify centroids/centers of gravity in the network of nodes as shown below.
You can read more about how participants used clustering algorithms and MIP to solve a supply chain problem on our community: AIMMS MOPTA 2020 Results.
Example and Prerequisites
The example AIMMS project and Python modules we will refer to in this article can be downloaded from here.
The download contains:
aimmsModel: The AIMMS project folder which is initialized with geographical nodes around the Greater Seattle area.
app: The Python work directory which contains the KMeans model along with modules required for deploying the model as a web service using Flask.
requirements.txt: The list of Python packages required.
Dockerfile: A docker file you can use to create an image (more later).
Installing Prerequisites
In addition to the prerequisites outlined in Development Tools, you will need to install the below for this example.
The example project is developed using AIMMS version 4.82.6, so we recommend you use at least that version. Download AIMMS Developer.
The Python modules in the example are developed in Python 3.8.
Tip
It is usually recommended to create a virtual environment so that your local Python installation is not changed.
Use
py -3 -m venv envto start a virtual environment. Read more on Python DocsThis example requires the packages
scikit-learnandFlaskas outlined in the filerequirements.txt. You can install these packages by using the command line prompt:pip install -r requirements.txt --user
The Python Model
app/kmeansClust.py has the function mykMeans which takes in the number of clusters numClusters and latitude-longitude data coordData and fits a
KMeans model.
A sample input file is provided in app/input.json. Note that only some rows are displayed below.
{
	"numClusters": 8.0,
	"latitude": [
		47.106588,
		47.1012554,
		47.63243493
	],
	"longitude": [
		-120.9645421,
		-122.2040832,
		-122.2273874
	]
}
app/dataio.py contains functions which prepare the data for consumption by myKmeans and our AIMMS project.
For example, dataFromCluster retrieves data from the input.JSON and simply transforms the latitude and longitude arrays into an array of tuples.
In app/main.py, we use the Flask package to expose different Python functions as APIs.
 1from flask import Flask
 2from flask import request
 3import kmeansClust
 4
 5app = Flask(__name__)
 6
 7@app.route('/hello', methods=["GET"])
 8
 9def hello_world():
10    return "hello world"
11
12@app.route('/', methods=["POST"])
13
14def aimms_call():
15    ourInput = request.get_json()
16    return kmeansClust.mykMeans(ourInput)
17
18if __name__ == '__main__':
19  app.run(host='0.0.0.0', port=8000)
In this example, we have two APIs differentiated by the first argument of @app.route calls.
/hellowill return “hello world”. A simple test case./will run the input JSON file through themyKmeansfunction and return the output as a JSON file.
Running Locally
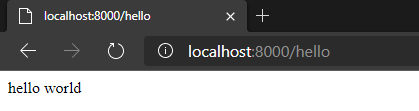
If you run the app/main.py in terminal (using python main.py), Flask will start a local web server.
You can test this server by typing in the URL http://localhost:8000/hello in your browser.
Now, testing the clustering function/API in a browser is not as straightforward as this one requires input data in the JSON format (as highlighted in line 15 in the above code-block).
We will use the Postman app to call this API by pasting the contents of input.json in the Body attribute as shown below.
It will return the output of mykMeans as a JSON object.
Note
The clustering method in main.py has been updated to use “POST” instead of “GET” as displayed in the below screenshot.
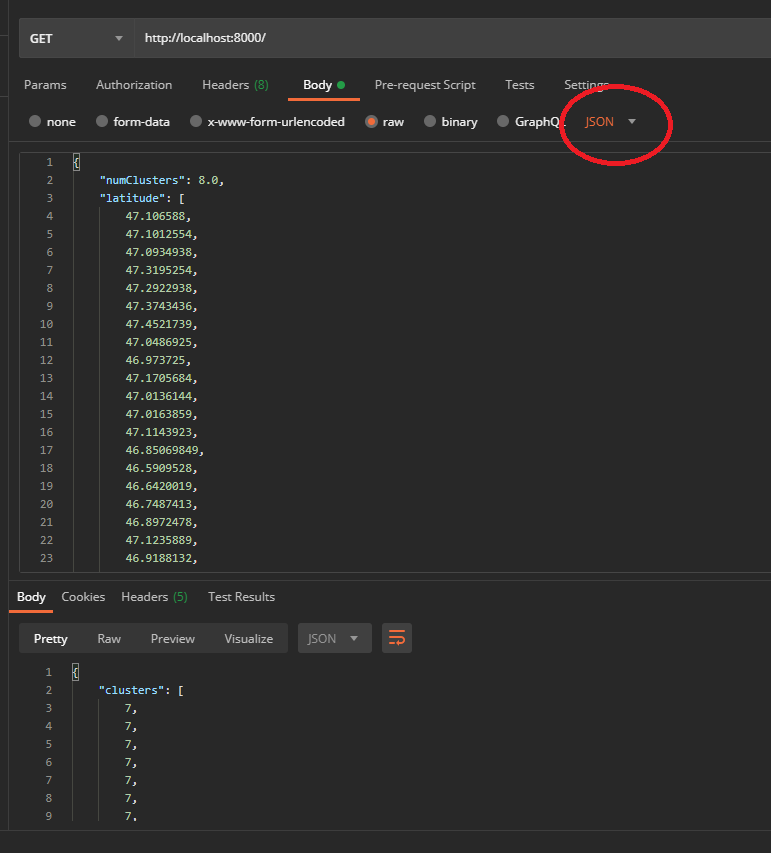
Make sure to set the attributes in the Body tab as highlighted in the image.
The AIMMS Model
The AIMMS project aimmsModel has the identifiers pLatitude(iLoc), pLongitude(iLoc) and pNumClusters which we need export in a format similar to input.json.
Data I/O
prWriteJSON creates the input file as the Python model expects and prReadJSON reads the result file into AIMMS.
 1spOutFile := "input.json";
 2spMapName := "outMap";
 3spMapFile := "apiCalls//outMap.xml";
 4
 5dex::AddMapping(spMapName , spMapFile);
 6
 7dex::WriteToFile(
 8        dataFile    : spOutFile ,
 9        mappingName : spMapName ,
10        pretty      :  1);
Note
It is not necessary that the pretty argument for dex::WriteToFile is set to 1 but it helps with readability of the json file, which is particularly helpful during development.
prWriteJSON uses the mapping file aimmsModel/apiCalls/outMap.xml to create this input.json file.
1<AimmsJSONMapping>
2    <ObjectMapping>
3        <ValueMapping name="numClusters" maps-to="pNumClusters"/>
4        <ArrayMapping name="latitude">
5            <ValueMapping iterative-binds-to="iLoc" maps-to="pLatitude(iLoc)" dense-write="pLatitude(iLoc)"/>
6        </ArrayMapping>
ObjectMapping initializes a key-value tree inside which ValueMapping is the first node which holds the scalar parameter pNumClusters. To write out indexed AIMMS identifiers, we can use the ArrayMapping like in line 4 which writes out pLatitude as an array value to the key latitude.
Similarly, prReadJSON will use the mapping file aimmsModel/apiCalls/inMap.xml to load the output of mykMeans into AIMMS identifiers pCluster(iLoc), pCenLat(iCentroid) and pCenLon(iCentroid).
1<AimmsJSONMapping>
2    <ObjectMapping>
3        <ArrayMapping name="clusters">
4            <ValueMapping iterative-binds-to="iLoc" iterative-existing="1" maps-to="pCluster(iLoc)"/>
5        </ArrayMapping>
6        <ArrayMapping name="lat">
7            <ValueMapping iterative-binds-to="iCentroid" maps-to="pCenLat(iCentroid)"/>
8        </ArrayMapping>
Note the difference between the first mapping (for pCluster) and the remaining two. iterative-existing=1 is added to the map of pCluster because the elements iLoc already exist in our project, whereas for the other two - we are letting the DataExchange library create new elements in the set sCentroids.
Read more in AIMMS Docs.
Calling the API
Now we simply use the HTTP library functions to make a GET call to the API created in the previous section as shown in procedure prCallAPI.
 2!starting request
 3web::request_create(requestId : spReqID );
 4web::request_setURL(spReqID, spURL);
 5web::request_setMethod(spReqID, "POST");
 6!as we want to send data in a file. Set 2nd argument to 'None' if you only need to pass a scalar value
 7web::request_setRequestBody(spReqID, 'File', spOutFile);
 8!as we want to send a json file and default expectation is a txt file
 9web::request_getHeaders(spReqID, spRequestHeaders);
10spRequestHeaders['Content-Type'] := "application/json";
11web::request_setHeaders(spReqID, spRequestHeaders);
12web::request_setResponseBody(spReqID, 'File', spInFile);
The highlighted lines 9-12 are equivalent to setting the body attributes in the Postman app.
Make sure that the URL in spURL includes the appropriate http:// or https:// prefix.
Deployment
When the app/main.py file is run in terminal, a warning is displayed.
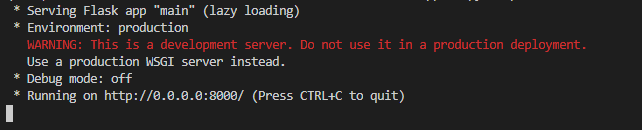
The app server running on http://localhost:8000 or http://0.0.0.0/8000 is available on your local machine and to your AIMMS Developer instance but what about apps deployed to AIMMS PRO On-Premise or AIMMS Cloud?
However, that is not a viable option if you are using AIMMS Cloud.
Some deployment options relevant to Flask are discussed on their project website.
We will however discuss deploying this web app using Docker, which is in fact similar to (or uses the same principles) some of the options discussed in the above link.
 1# Pull a pre-built docker image with nginx and python3 installed
 2FROM tiangolo/uwsgi-nginx-flask:python3.8
 3
 4ENV LISTEN_PORT=8000
 5EXPOSE 8000
 6
 7COPY /app /app
 8COPY requirements.txt /
 9
10# add the libraries you used in your python model to the requirements.txt file and uncomment below code before building the docker image
11RUN pip install --no-cache-dir -U pip
12RUN pip install --no-cache-dir -r /requirements.txt
The image built using this Dockerfile uses Tiangolo’s nginx server as a base and it comes with Python 3.8 already installed.
Lines 7-8 copy the Python modules we developed onto the base image and lines 11-12 install the packages required from the requirements.txt file.
The Dockerfile is basically automating the installation of prerequisites as outlined in Installing Prerequisites.
The below command line prompts will build a Docker image of the name imageName:latest and start a container.
Most text editors or IDEs (such as VS Code or PyCharm) have a Docker plugin now.
Read more about these options in Docker Docs.
docker build --pull --rm -f "Dockerfile" -t imageName:latest "."

docker run -d -p 8000:8000 --name "containerName" imageName
Now, we can use the same URLs http://localhost:8000/ or http://localhost:8000/hello to access the Flask APIs, the only difference being they are hosted on Docker Desktop instead of Flask’s development server. Once you deploy this Docker image, your API will be available globally.