Install CDM Service
During the development of an application using CDM, the embedded CDM server is ideal, as mistakes and restarts are easily captured by manually switching and/or clearing the database that stores the CDM data.
Note
When publishing applications in an AIMMS Cloud, you do not have to install a CDM service. The appropriate CDM service is started on demand, and stops itself after some idle time.
When testing or deploying an application with multiple collaborating users a CDM service needs to be installed that handles commits by storing the data and informing other users of these commits. The architecture that we want to achieve looks as follows:
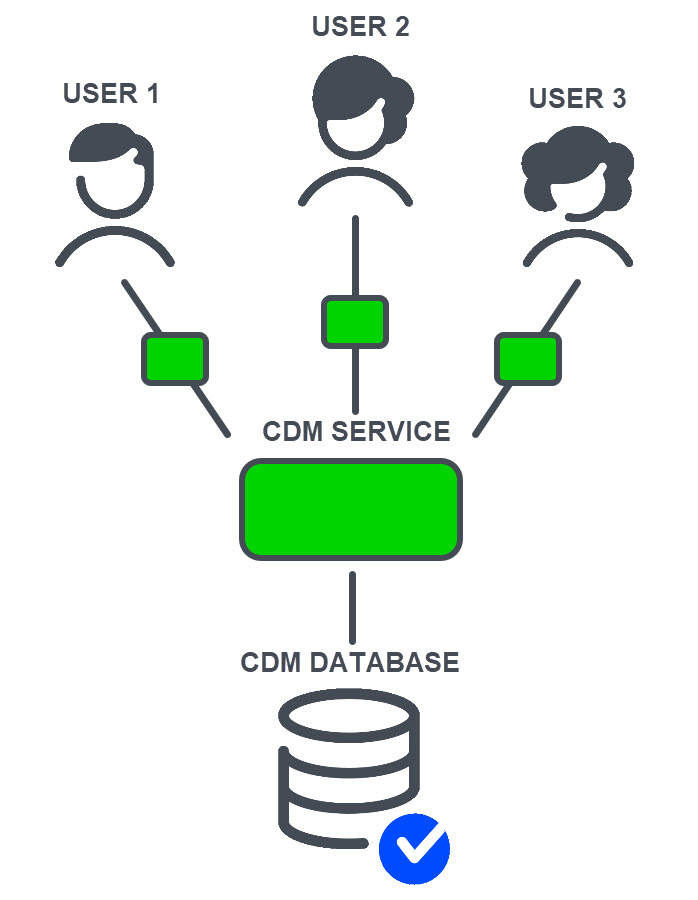
We will first focus on the central part of the above, namely to get a CDM service installed, next we will link it to a database and finally, we will illustrate an application directly connected to a CDM service.
Installation of CDM Service
Uninstalling an Older Version of the CDM Service
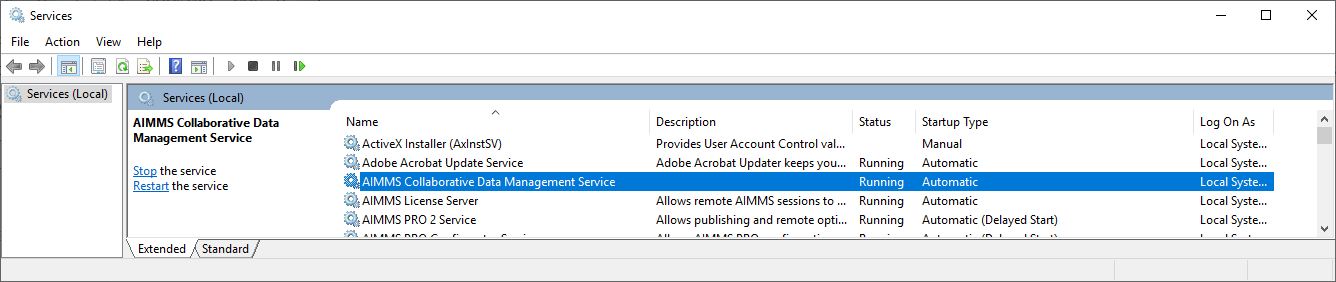
First make sure there is no other (older) CDM service installed on the target machine. If it is, you will need to uninstall that first before you can install the new version. You can check whether the CDM service is installed by starting the Windows Service Manager/Windows 10 services app.
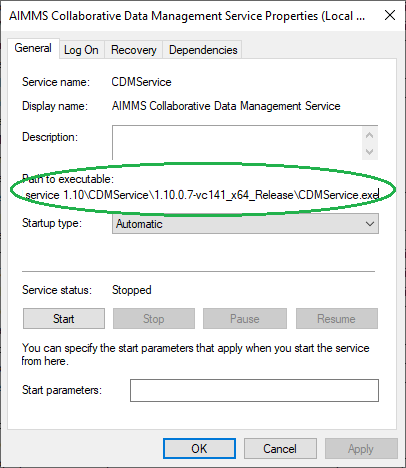
When the service is installed, you will need to identify the installation folder by right-clicking on the service and selecting Properties. This will show the following dialog and tell you from which folder it is installed:
Open a command prompt (run as administrator)
cdto go to that folderIf the Service name is
CDMServicethen you can:Execute
CDMService.exe --uninstall
Otherwise you will have to use the name argument. For Instance if your service is called CDMService19998, then:
Execute
CDMService.exe --uninstall --name CDMService19998
Download the New CDM Service Executable
Let’s start with downloading the executable on the machine that should run the CDM service. Depending on the protocol of choice this download can be:
Note
This is correct at the time of writing this article. To make sure the protocol is up to date, check the value of the string parameter cdm::WindowsServiceDownloadLocation which contains the URL for the download that corresponds to the protocol of your library.
Installing a New CDM Service
Now we can install CDM.
First run the executable, it will just unpack itself and create new folder.
Move the created folder to an appropriate place.
Open a command prompt with elevated rights (run as administrator).
cdto the created folder.Execute the command
CDMService.exe --install.Open the Windows Service Manager/Windows 10 services app.
Open the properties of the CDM service.
Make sure the start up type is
automatic, and the service is started.
Ensure the CDM Service is Accessible
Make sure that the port chosen, typically 19999, is open on the machine that hosts the CDM service.
You can check whether this port is open using the command netstat -a on a CMD prompt.
Linking the CDM Service to a Database
The configuration file CDMConfig.xml contains the database type and optionally the database location, and optionally the authorization information.
The default configuration file uses SQLite and stores the data in the folder C:\CDM.
Adapt the CDMConfig.xml to the appropriate database:
Examples of configurations for other databases can be found in the folder ConfigExamples.
The default configuration uses SQLite that creates its schemas as separate files in the folder C:\\CDM.
As alternative, you can use one of the following database vendors:
PostGreSQL. Copy and adapt the example file
ConfigExamples/CDMConfig - PostgreSQL.xml.MySQL. Copy and adapt the example file
ConfigExamples/CDMConfig - MySQL.xml.SQL Server. Copy and adapt the example file
ConfigExamples/CDMConfig - SQLServer.xml.
To copy and adapt the example means to copy example file
over the file CDMConfig.xml and replace the elements host, port, database, servername, instancename, user, and password
with actual contents. The {} and [] should be removed. A {} is mandatory, a [] is optional.
Note
When the CDM service is running, and you want to change the configuration, you will need to stop and restart the service using the Windows Service Manager/Windows 10 services app.
Link an AIMMS Application to a Running CDM Service
Here cdm::serverURI should be set to tcp://CDMServiceHostName:19999 where 19999 is the port number.
This port number may be chosen differently, as long as it matches the <listenport> entry in the xml configuration file.
Below is an example of CDM startup code that connects to an existing shared CDM service, whether the application is opened as a deployed application or as an application in the AIMMS IDE.
 1cdm::ApplicationDatabase := "CDM-Example-DB";
 2cdm::DataSchemaVersion := "1";
 3
 4cdm::ServerURI := "tcp://serverNameThatHostsCDMService:19999";
 5
 6cdm::CallTimeout := 300000;
 7
 8cdm::ServiceLogLevel := 'TRACE';
 9
10cdm::ConnectToApplicationDB;
11
12! Make this app auto-commit and auto-pull
13cdm::ListenToDataChanges := 1;
14cdm::AutoCommitCategory(cdm::cat) := 1;
15cdm::AutoPullCategory(cdm::cat) := 1;
16cdm::StartListeningToDataChanges;
Download Example
The project download CDM-Connected-via-URI is a variation of the standard example for CDM.