Write Data to a Table
A database table may not always match the data in the related AIMMS model. In addition, we may want to write all possible elements explicitly, or just a predetermined selection of rows instead of just the non-zeros. Last but not least, from the context in the application, it may be clear that all of the data is changed, or just one or a few rows.
This is why it is important to select the number of rows to be written (all or few) and there are several tactics available to help you make this selection. We discuss the following tactics in this article:
Writing non-zeros directly to the database table.
Writing all possible elements to the database table.
Writing a selection of rows to the database table.
Insert a single row into a database table.
Example Project Description
As we are viewing the same data over and over again; and want to focus on the difference between the various tactics, we use an abstract example.
Two sets with a few elements: s_A and s_B with indices i_a and i_b respectively.
In addition, there is a parameter p_Dat declared over these sets; which may or may not be sparse, may or may not be stored sparse in the database, or we may want to store just a modification.
We use SQLite with the following database table declaration:
1CREATE TABLE `TableAB` (
2    `NamesA`    TEXT NOT NULL,
3    `NamesB`    TEXT NOT NULL,
4    `Vals1` REAL,
5    `vals2` REAL,
6    PRIMARY KEY(`NamesA`,`NamesB`)
7)
The AIMMS data is mapped to this SQLite database table as follows:
 1DatabaseTable db_AB {
 2    DataSource: sp_Conn;
 3    TableName: "TableAB";
 4    Property: NoImplicitMapping;
 5    Mapping: {
 6        "NamesA" -->i_a,
 7        "NamesB" -->i_b,
 8        "Vals1"  -->p_dat( i_a, i_b )
 9    }
10}
Methods of Writing Data
Below we discuss several methods for writing data to a table.
Write in Replace Mode
The most direct way of writing data is:
1Procedure pr_Write {
2    Body: {
3        write p_dat(i_a, i_b) to table db_AB  ;
4    }
5}
Line 3 in the above code block is is equivalent to:
write p_dat(i_a, i_b) to table db_AB
    in replace mode ;
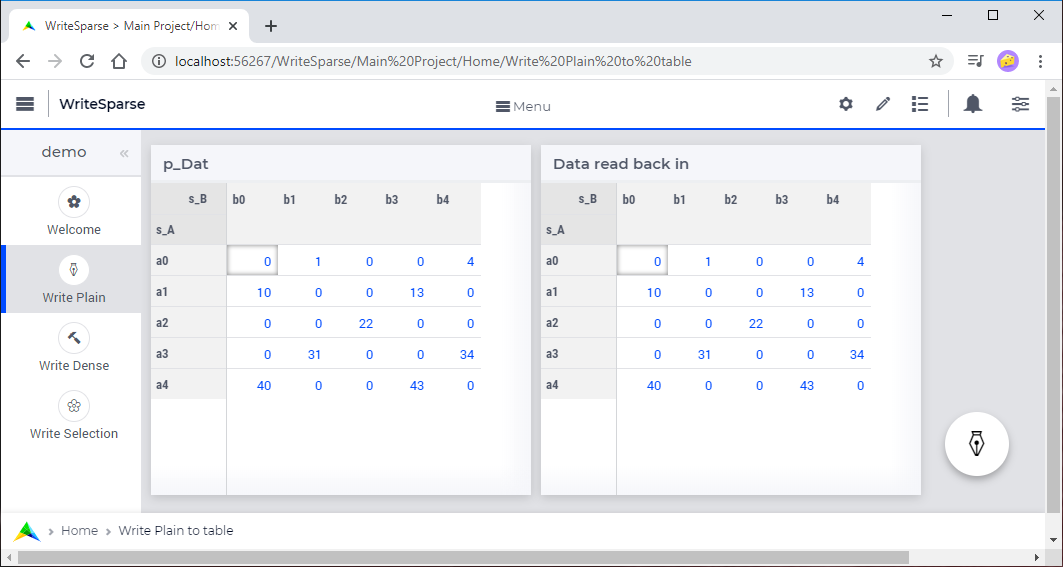
Given the data in the table on the left of the following WebUI image:
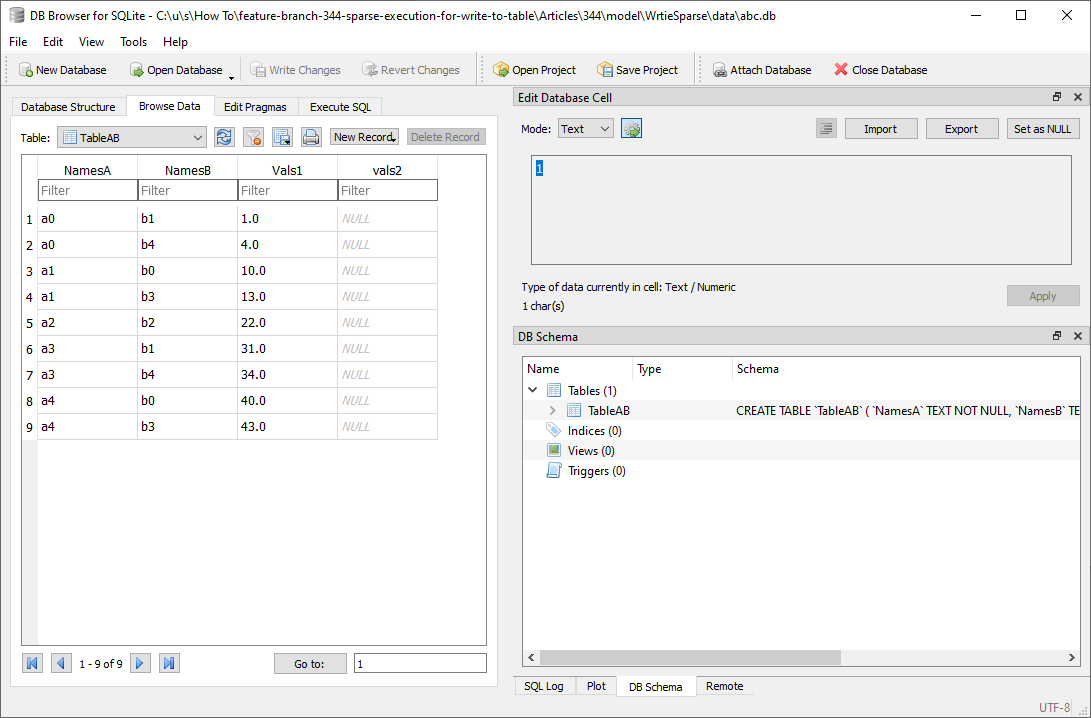
This will result in the following database table.
Remarks:
Nine rows are written to this table; only for the non-zeros of
p_Dat.Reading back
p_Datresults in the same data, see the table on the right in above WebUI image.
Write in Dense Mode
When we also want the zeros to be stored in the database table, we can use the “in dense mode” using the following code:
1Procedure pr_Write {
2    Body: {
3        write p_dat(i_a, i_b) to table db_AB
4            in dense mode ;
5    }
6}
With this procedure, the data written and read back is illustrated in the left and in the right table of the WebUI image below.
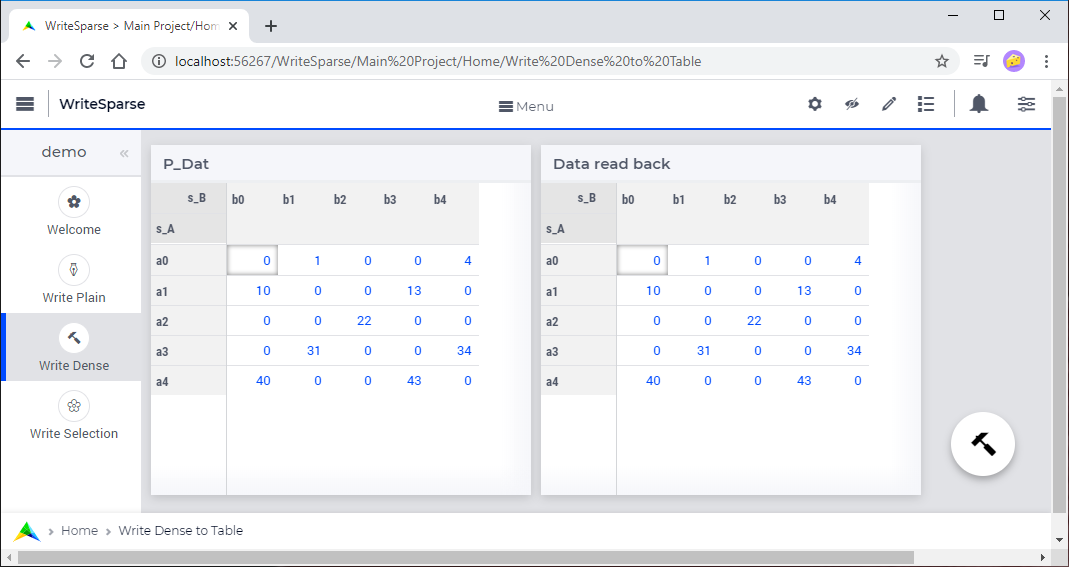
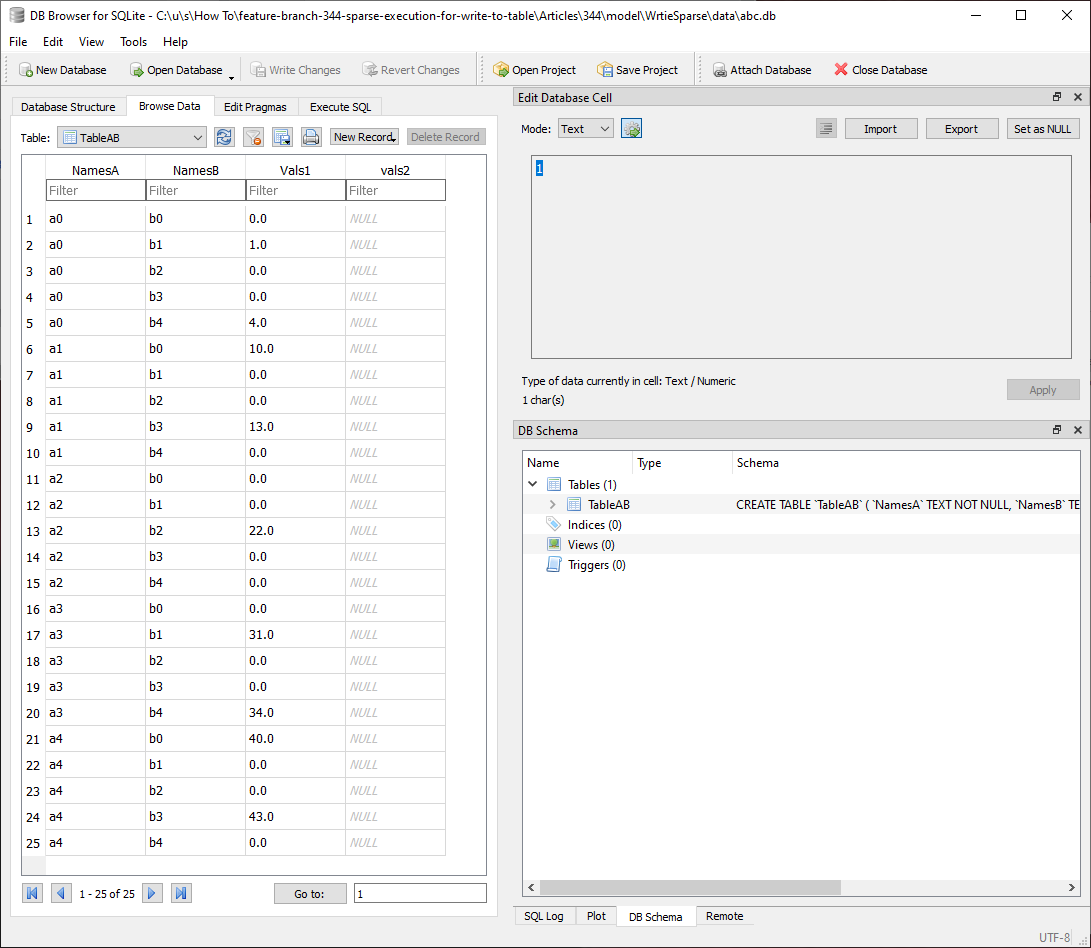
This is actually the same as in the previous section except that the number of rows written now is 25, as the 0.0’s are also written.
Write Selection
In the above section, a lot of rows are written. To reduce the number of rows written, we can specify a selection as follows:
By filtering per index,
Or by filtering over tuples, as illustrated in the following code.
1Procedure pr_Write {
2    Body: {
3        write p_dat(i_a, i_b) to table db_AB
4            filtering (i_a, i_b) in rel_flt;
5    }
6}
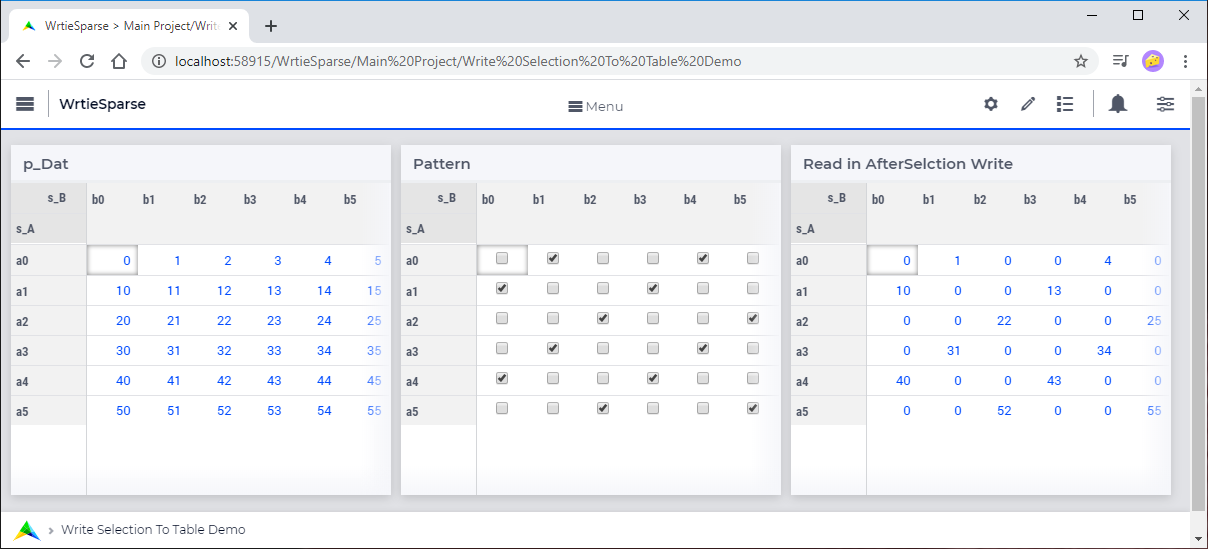
When the data is an almost full matrix, as illustrated in the table on the left, and specify a filter pattern, according to the table in the middle and use that pattern to filter the writing. rel_flt is a relation which contains the combinations of (i_a, i_b) which have a non-zero value in the pattern table.
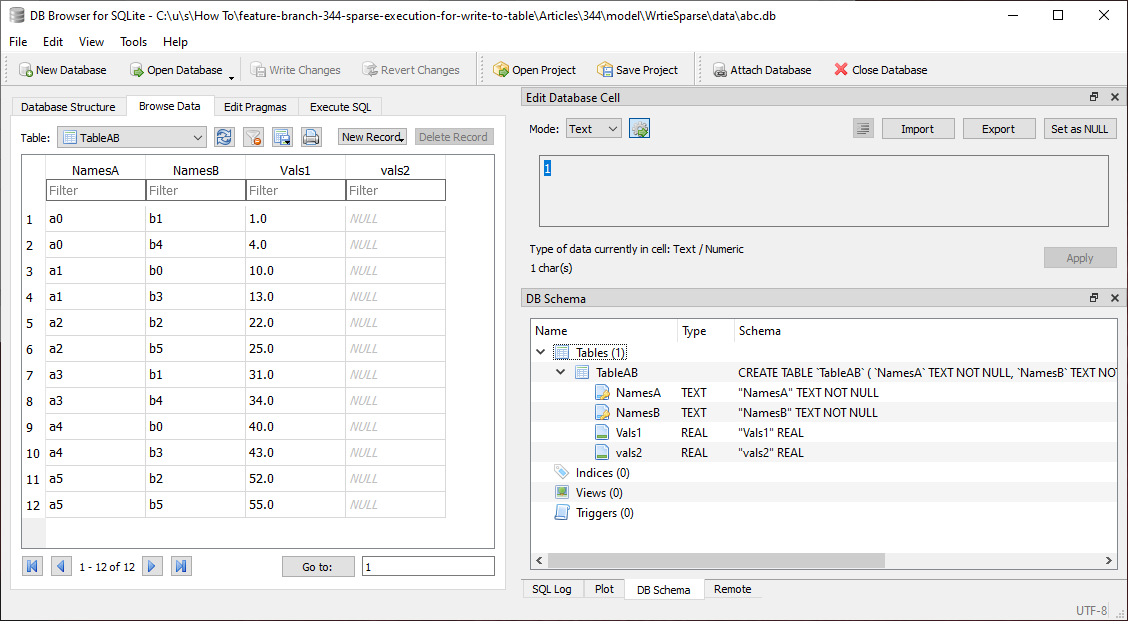
Reading the data back results in the table on the right. Note that the table on the left and the table on the right are no longer same!
Note also that the database contains less rows:
Insert Selection
When it is clear in the application which rows are added, and these rows are stored in a relation, say ref_flt,
then we can limit the database IO to just inserting those rows as follows:
1Procedure pr_Write {
2    Body: {
3        write p_dat(i_a, i_b) to table db_AB
4            in insert mode
5            filtering (i_a, i_b) in rel_flt;
6    }
7}
Some data entry applications explicitly track which data is newly entered, which data is modified, and which data is left untouched.
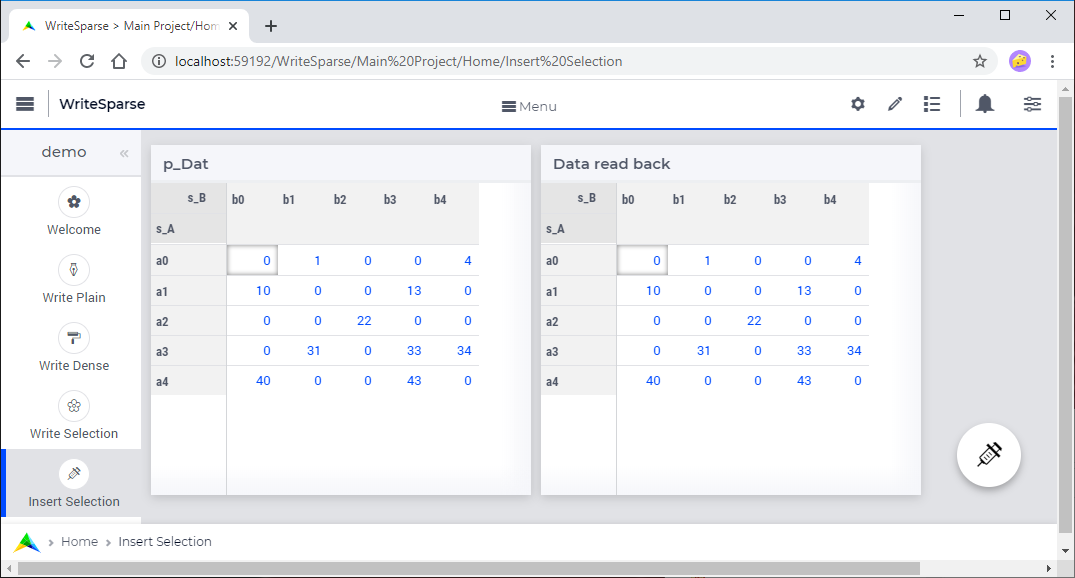
When we start with the p_Dat table in the section Write in Replace mode and only insert one element p_Dat('a3','b3') = 33, this will result in only one SQL insert statement executed.
The AIMMS data is shown here:
and the database table data is shown here:
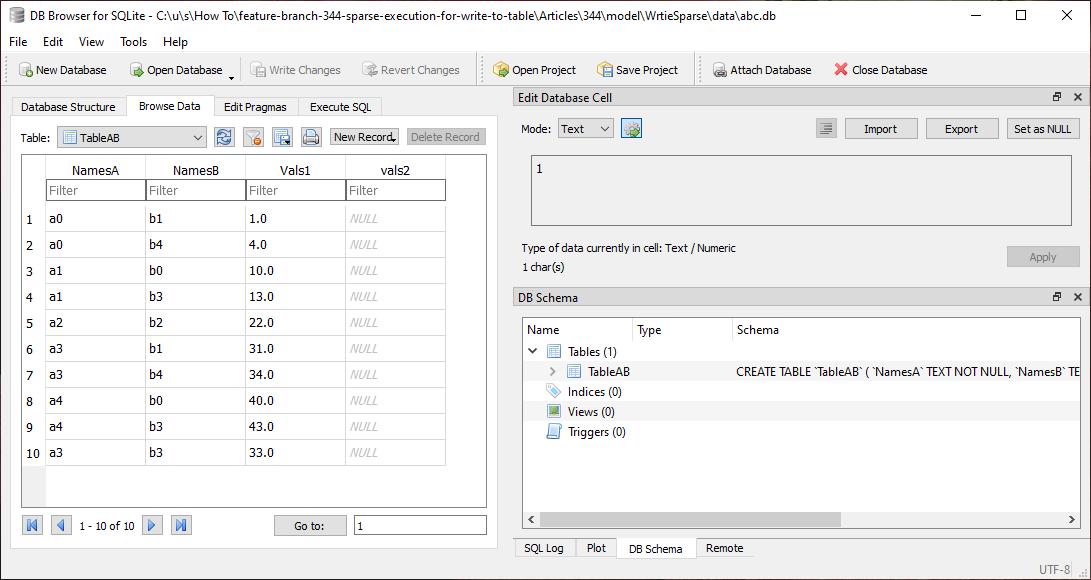
Apparently, SQLite appends the new element to the end.